Simple DIY Floating Shelves Tutorial + Decor Ideas simply organized
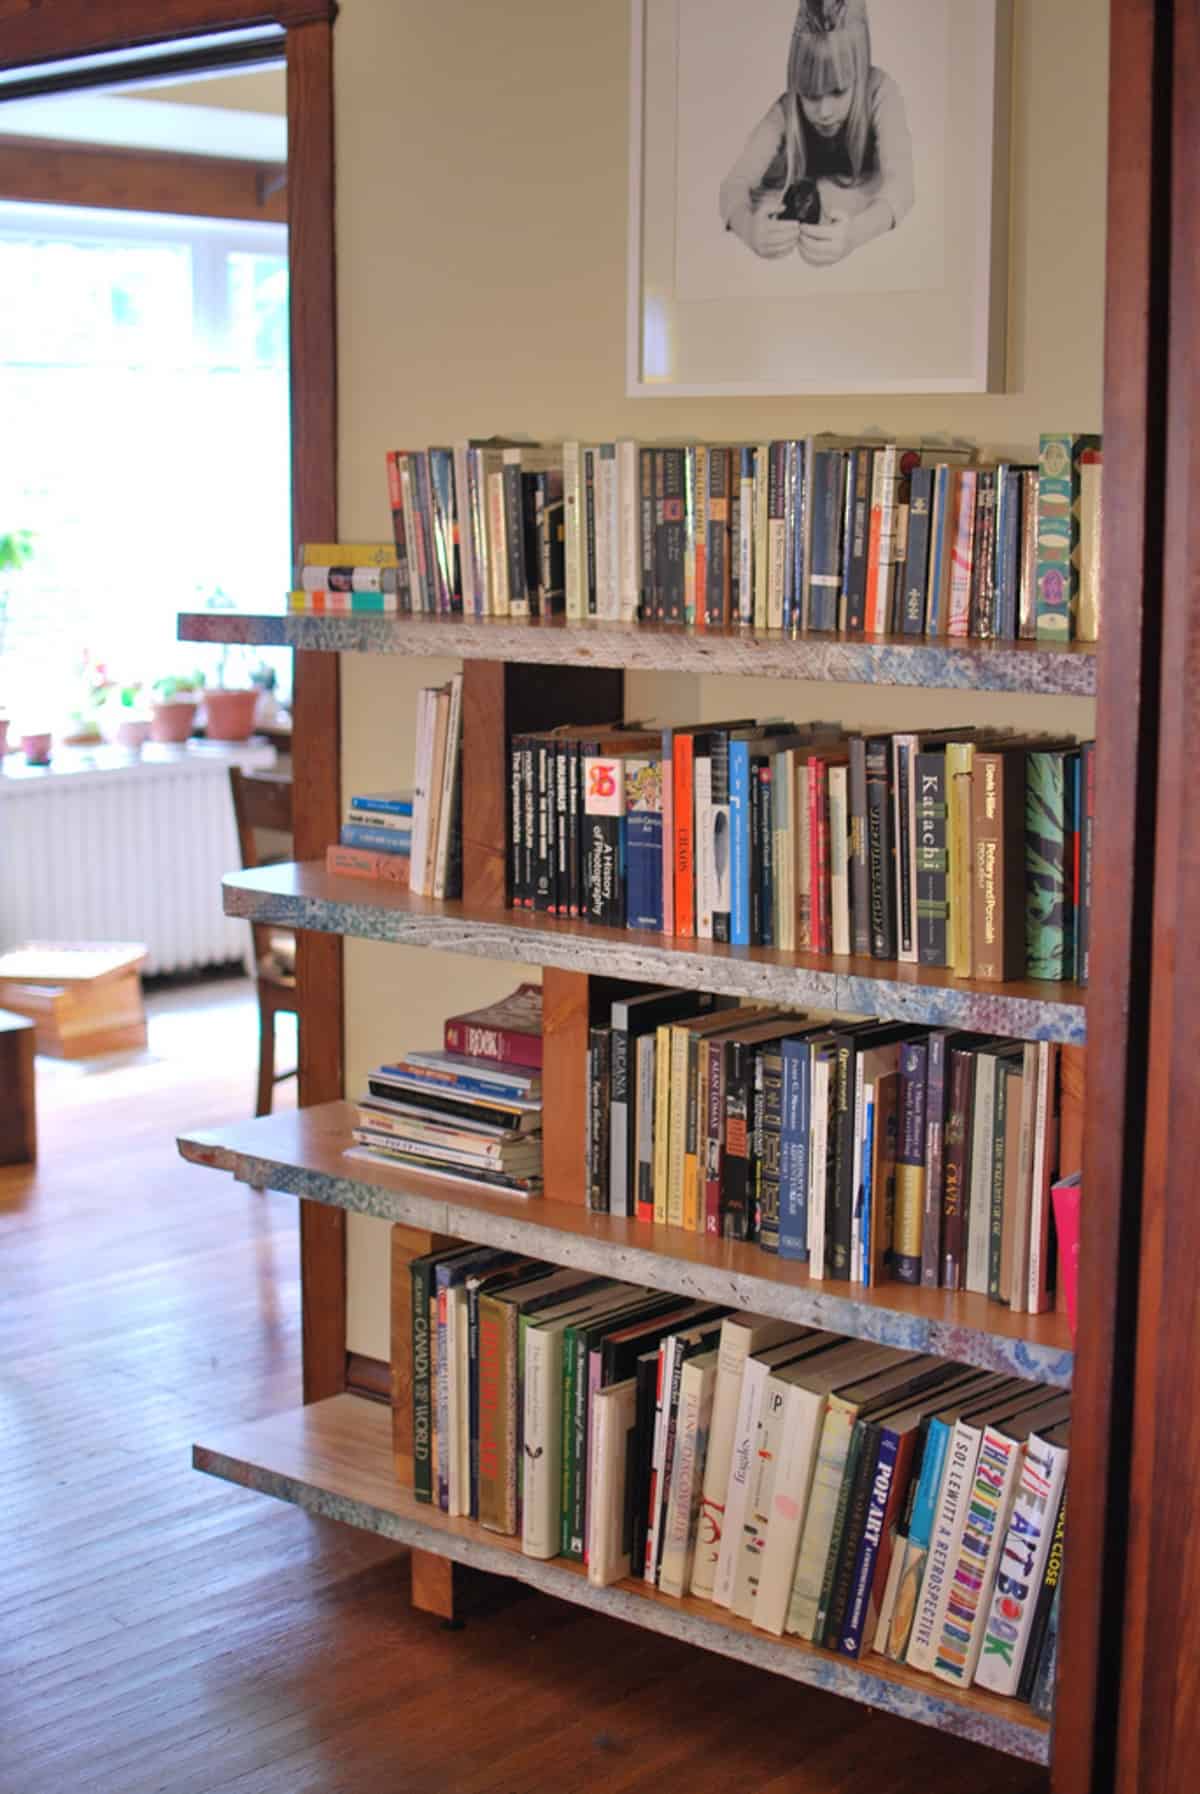
The doors slide open along a steel roller system at the top and the bottom to reveal the secret room. Each bookcase door has a fixed middle shelf and four adjustable shelves. The doors are available in hardwood veneers, MDF or vinyl-lam. Bookcase sizes range from 36in. to 66in.wide and up to 96in. high.
20 DIY Bookshelf Ideas Book Lovers Will Love Unhappy Hipsters
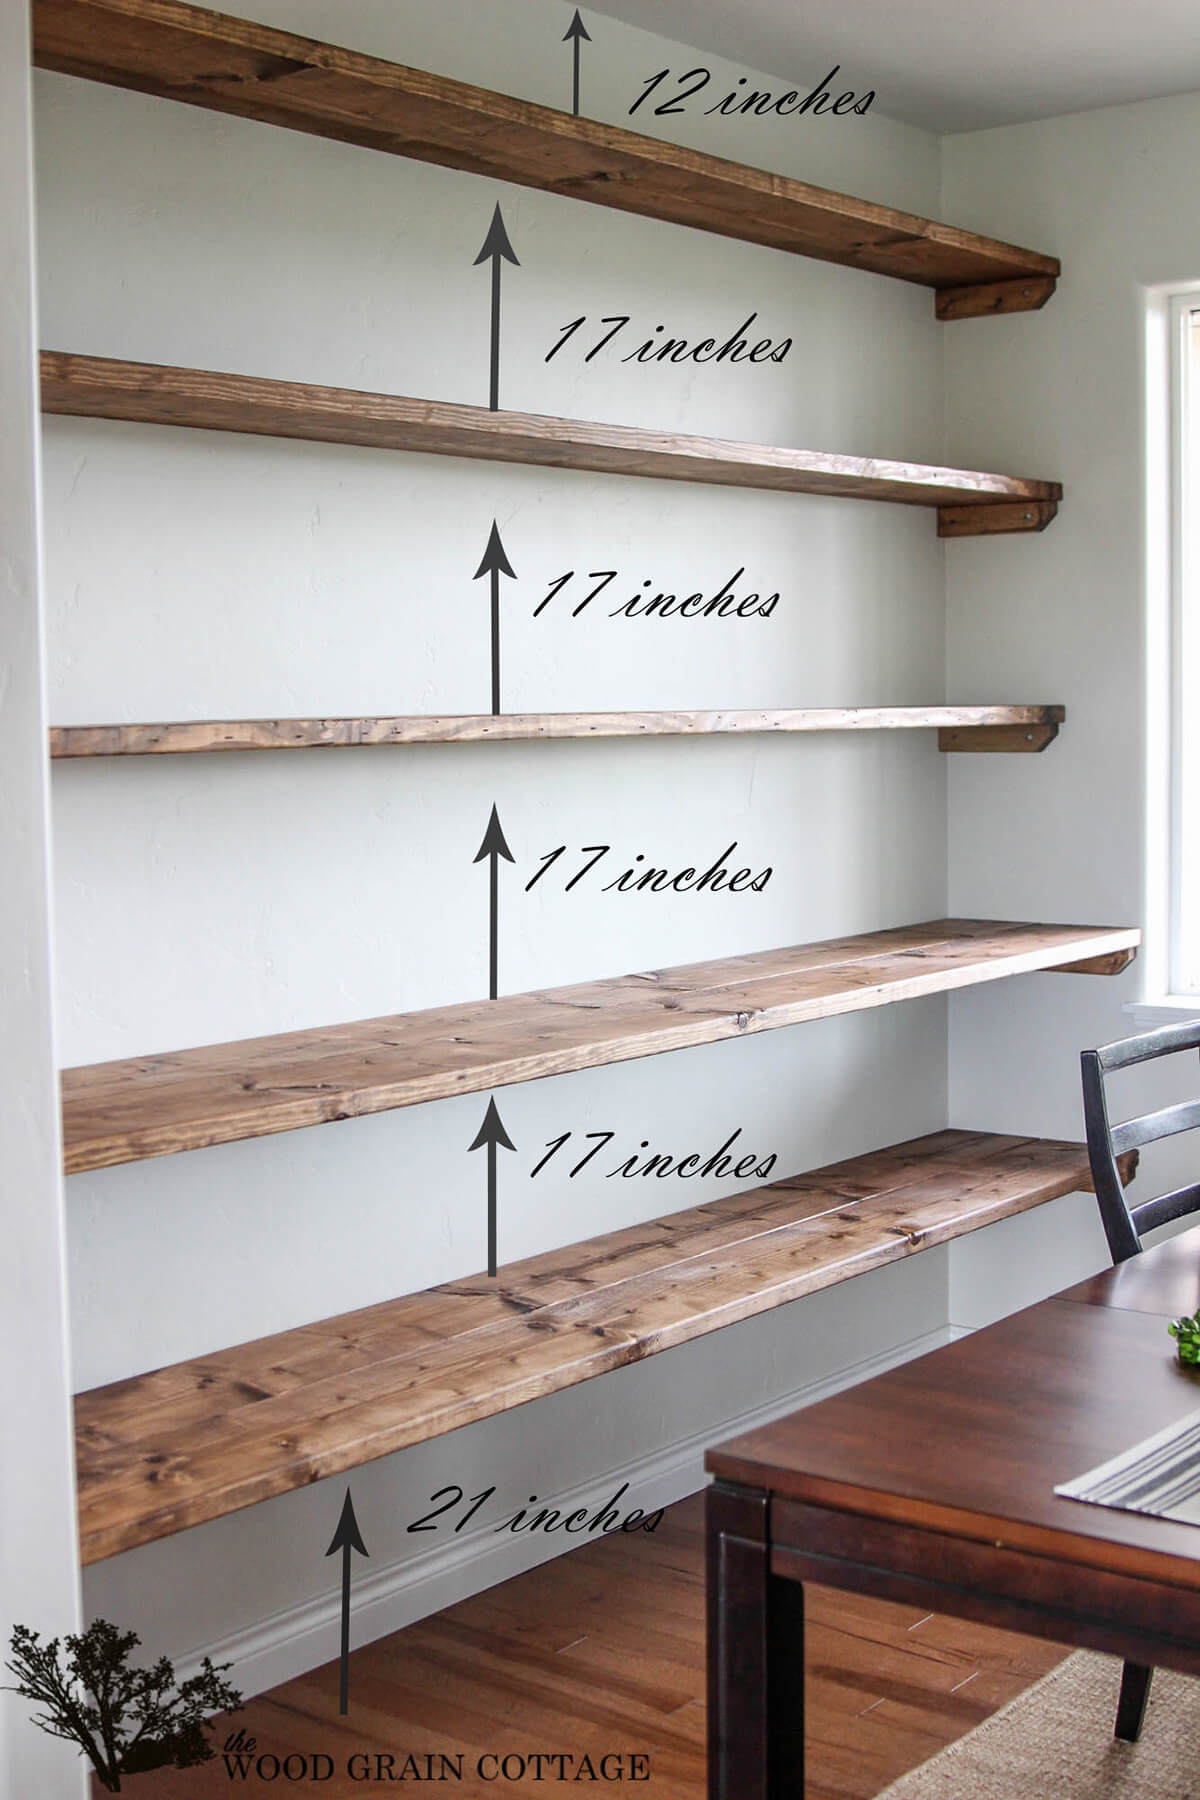
Trace the horizontal location for each shelf using a 4 ft. level as your guide. Use a stud finder to mark the locations of the studs and lightly press masking tape over each one. If you don't have a string line, use a long straightedge and mark the wall with a pencil. Check your marks for long wall shelf with the 4 ft. level.

DIY Floating Bookcase Free Plans • Ugly Duckling House
Make a wall cleat. Cut a wall cleat (H) out of a straight 2×4 and make it 1-1/2 in. x 1-3/8 in. x 70-3/4 in. Use your circular saw and the same cutting guide you used to cut the plywood pieces to width (set another 2×4 under the guide to keep it from tipping). Rip the cleat to width and then crosscut it to length.

Home Room Design, Home Interior Design, Interior Decorating, House
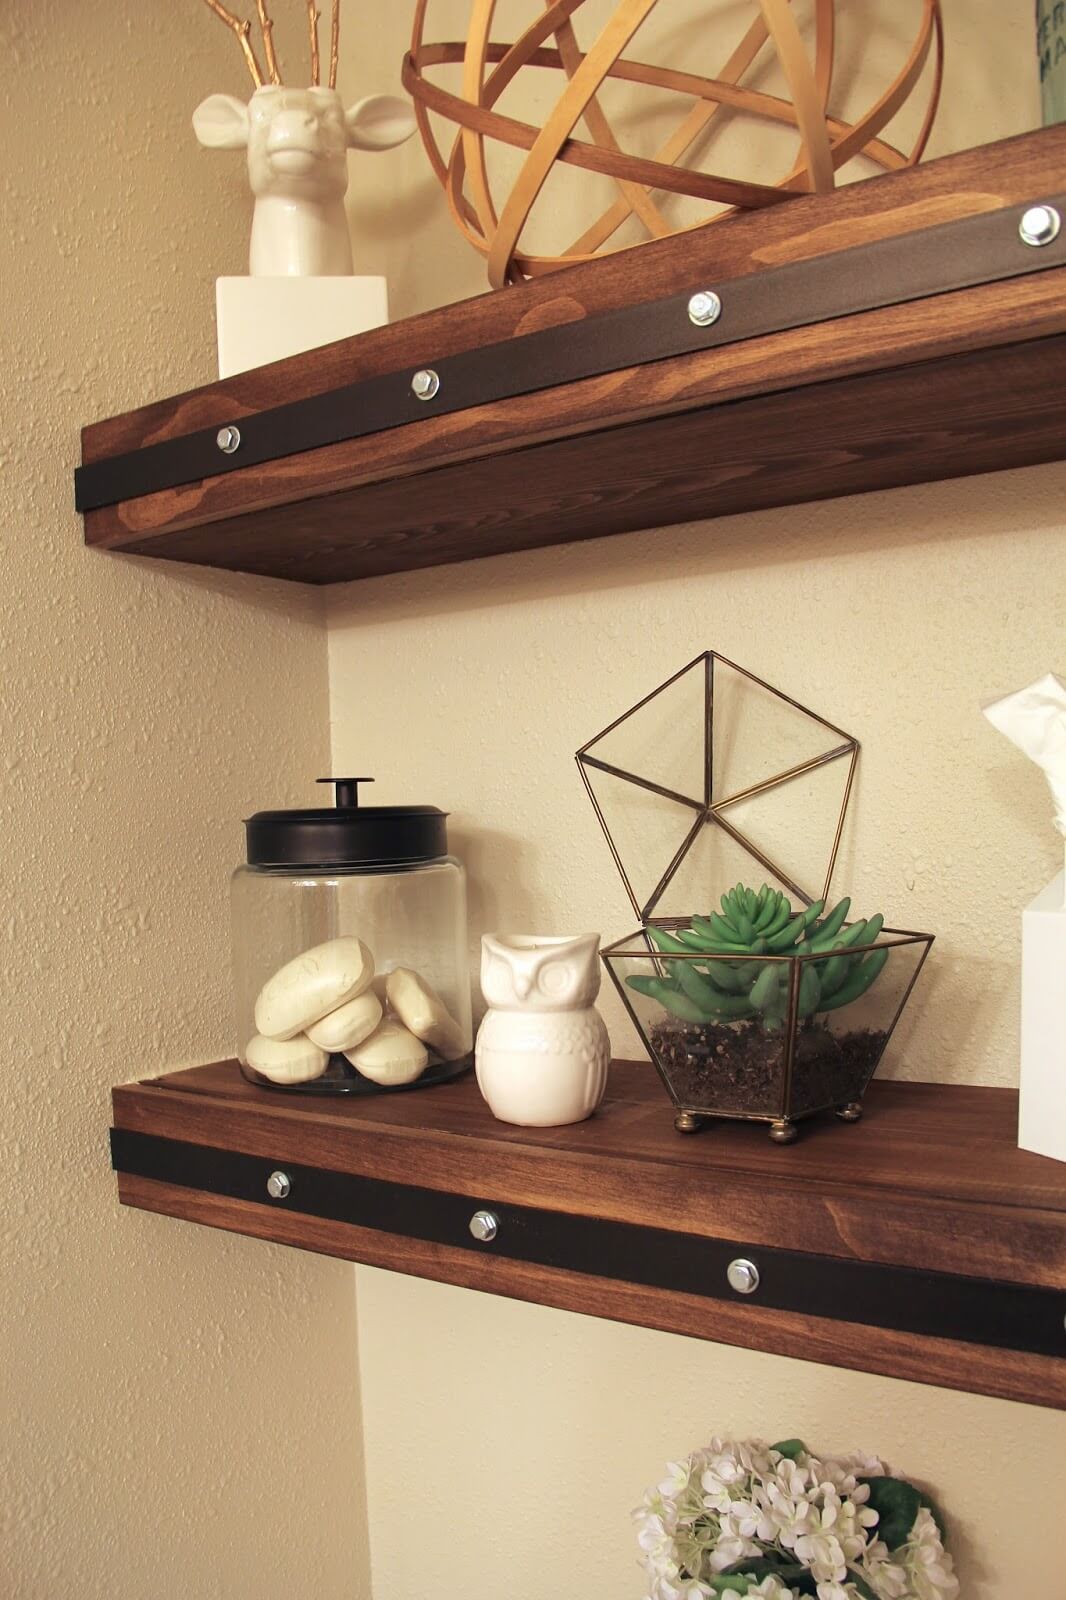
3. Cut wood for the top of the shelf. Cut a 1" x 6" wood plank for the top of your shelf. 4. Cut wood for the bottom of the shelf. Cut a 1" x 4" wood plank for the bottom of the shelf. 5. Cut wood for the front of the shelf. Cut a ¼-inch piece of plywood for the front of your shelf to cover up the interior frame.

simply organized Simple DIY Floating Shelves Tutorial + Decor Ideas
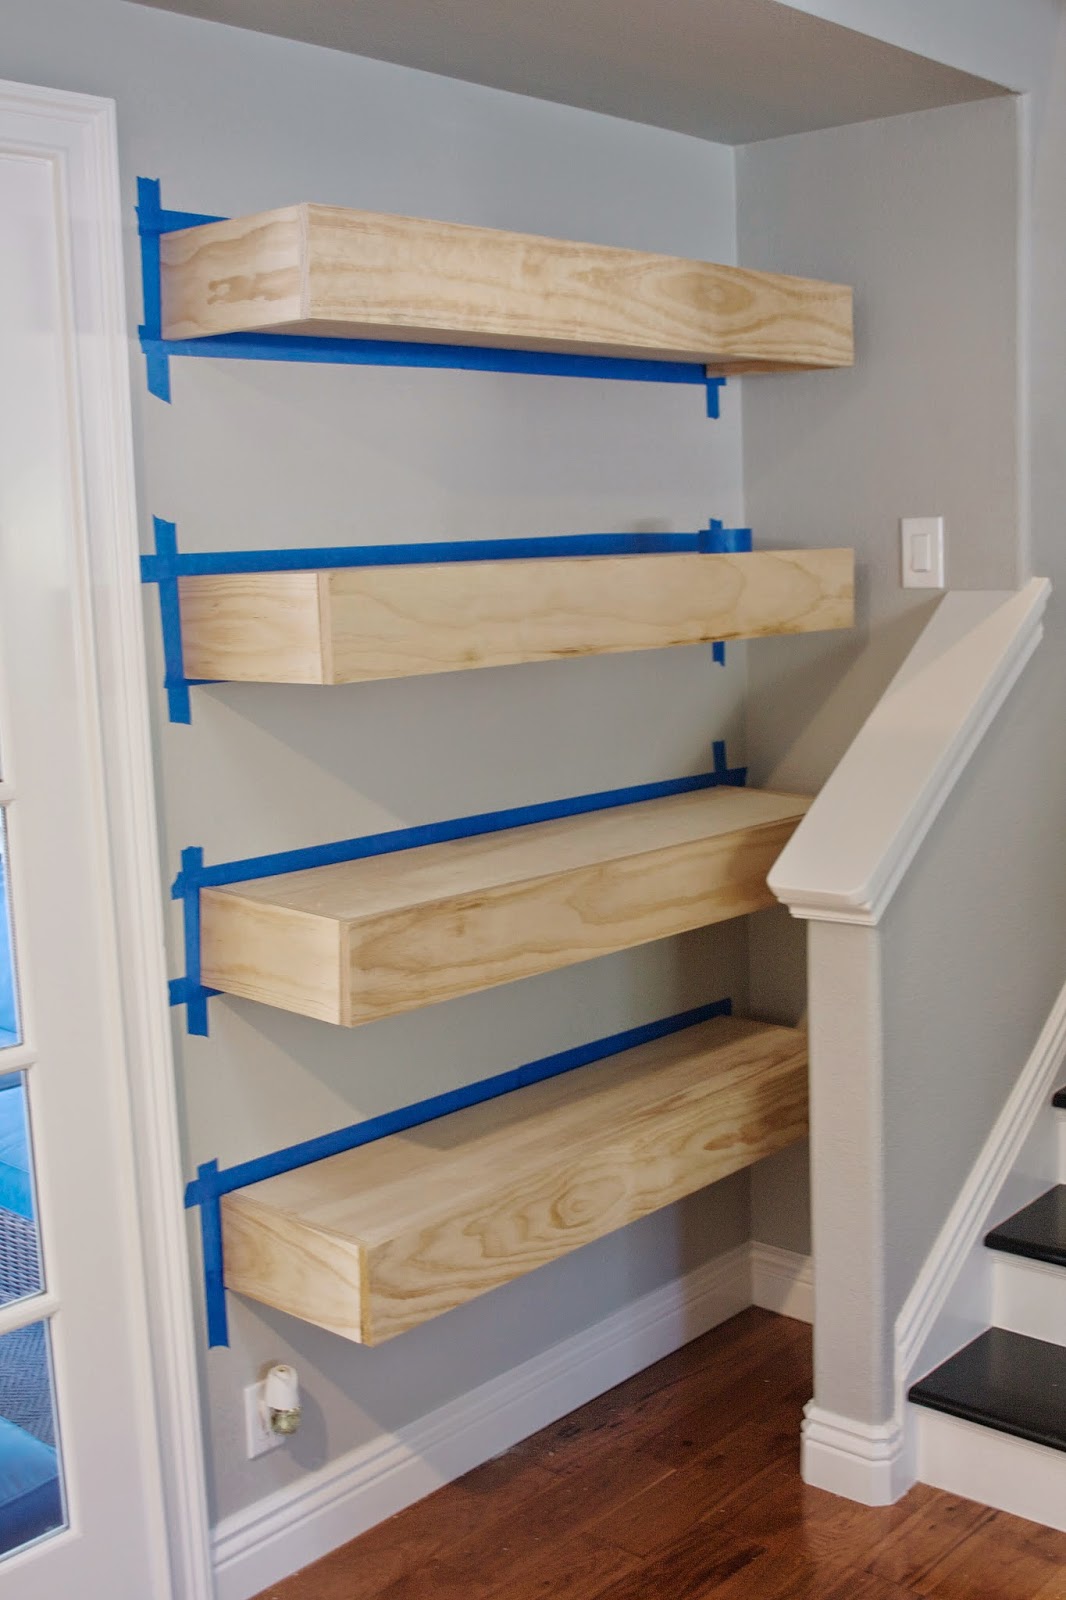
Get The Plans HERE. Time needed: 1 day. Get the cut list for this simple solid wood floating bookcase here. Cut the lumber (sides, top, bottom, shelves) I cut all of the 2x lumber on my miter saw: 2 equal top and bottom pieces, 2 side pieces, and however many shelves in the middle (subtract 3 inches from the top/bottom pieces to account for the.
27+ Best DIY Floating Shelf Ideas and Designs for 2021
Cut your board down to size and gather materials. The most cost-effective way to create DIY floating shelves is to buy a larger piece of wood and cut it into smaller sections using a miter or circular saw. You'll want to customize the size to fit the space you plan to hang them. We cut ours to 25 inches per shelf.
16 Easy and Stylish DIY Floating Shelves & Wall Shelves Page 2 of 2
Using a drill fitted with a ⅛-inch combination bit, drill two pilot holes into each leg. Drill through the leg and the support, and into the hanging strip. Screw the hanging strip to the legs with 2½-inch wood screws. Slide the bottom shelf into place for support. Tilt the assembled frame into place.
Simple and Trendy 13 DIY Floating Shelves
Then cut the 1×4 into (6) pieces @ 2.75″ inches length each. These will be the sides of the bookshelves. Next, you'll want to subtract 1.5″ inches from the shelf length, and use this measurement to cut the 1×2 board. We made (3) cuts: two at 29.5″ inches and one at 14″ inches. This will be used as the back panel for each shelf that.

Floating Bookshelf Designed By Alphaville â ¨ Shelves In 2019
Drill with drill bit. Electric screwdriver or screwdriver bit. Optional. Iron-on laminate edging - if you need to cover raw edges. Spray primer and spray paint - if you want to change the color of the brackets. Contact paper or shelf liner - if you want to wrap the shelves. Bookends - if you'll be placing books on the bookcase.
15 Best Ideas Floating Bookcases
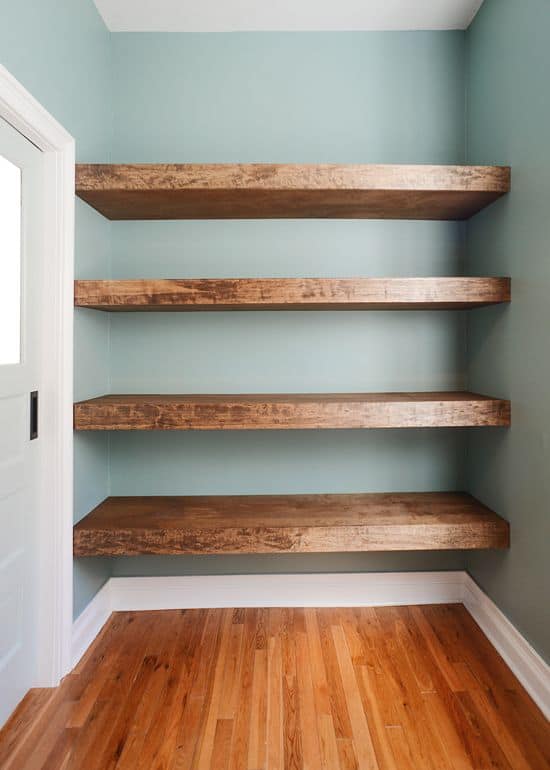
This looks so good! If you feel inspired to create your own built-in bookcase, there are a few steps to consider. First, plan out your measurements by determining the dimensions of your bookcase.

DIY Floating Shelves Get the Custom "builtin" look with Wallpaper
Place the 4″ wide piece of wood flat on a surface. Add wood glue on the edge of your other 2 pieces (the 1/2″ wide piece and the 2″ wide piece). Then secure them flat against the 4″ wide back cover piece at the edges. This will be "L" shaped. from the wood. Let the wood glue dry.

60 cheap diy wall shelves floating ideas (5) Shelves, Bookshelf
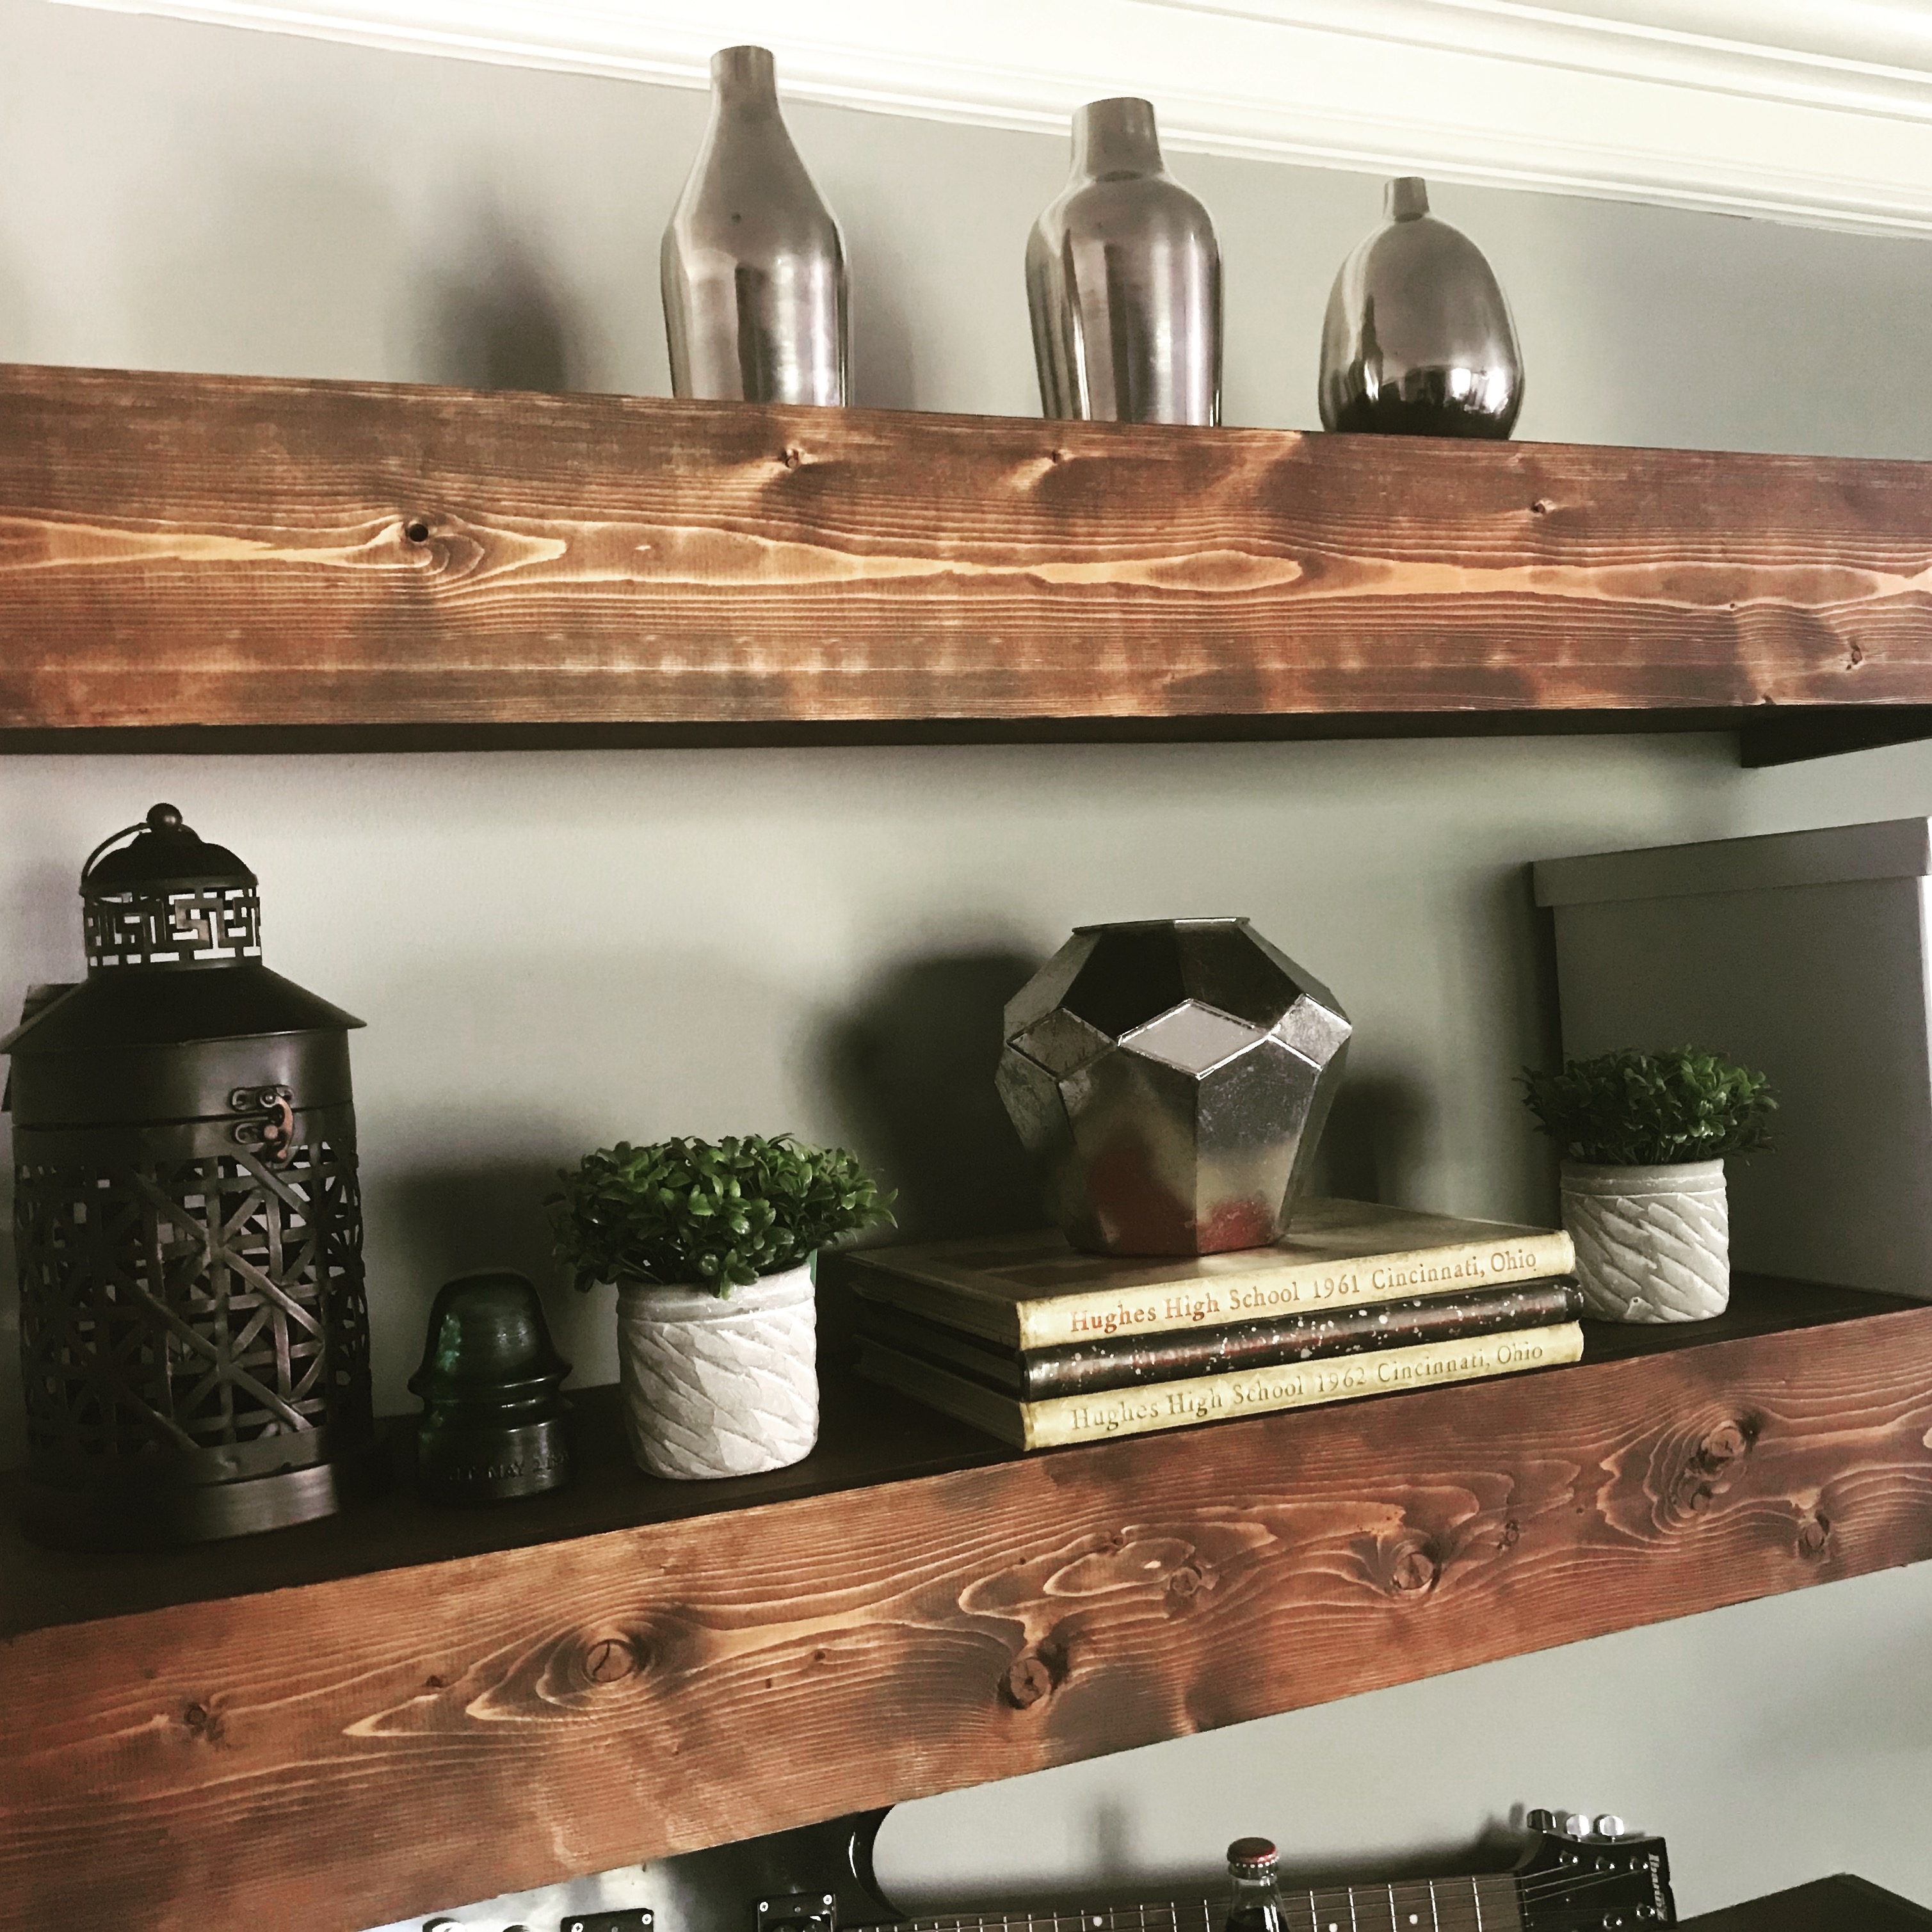
Steps for Building a Floating Shelf. For this DIY floating shelf project, I'm using stock boards from the home center, a miter saw to cut them to length, and a drill/driver to assemble the pieces with screws and wood glue. I'll also be using a sander to smooth my edges, but you can also just use a sanding sponge. Step 1: Cut the shelf to length
27+ Best DIY Floating Shelf Ideas and Designs for 2017
Tips on building this bookcase: This project can easily be made using a single sheet of plywood. Using a Kreg Rip-Cut and a circular saw, you can cut the pieces to size. But take make everything go quickly, I used 1x8x8 off the shelf lumber from my local home center and cut everything down with a miter saw.
DIY Floating Shelves Bonus Room Makeover Project
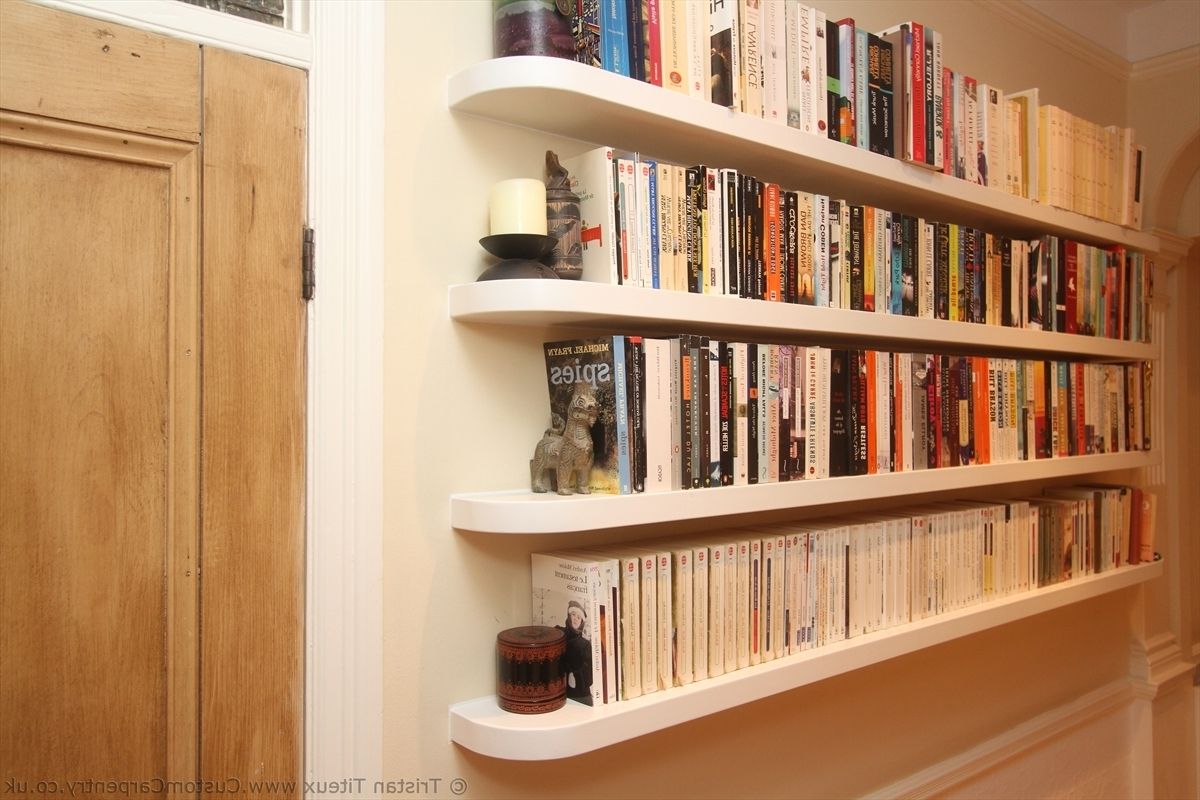
DIY: Floating Bookshelves. This is my favorite, no fuss project in terms of interior design! It takes about 20 minutes to do and can be completed with simple tools on a small budget. Until recently most of our books had still been in storage due to limited wall space in our tiny house. We put in so many windows it left little space to put up.

simply organized Simple DIY Floating Shelves Tutorial + Decor Ideas
Flip the first panel, the one that is now attached to the shelf framework, to expose the bottoms of the wooden strips. Again, run a line of wood glue along the top of each strip, place the free panel on top, and nail it to each strip. 6. Let the wood glue dry for 1-2 hours. The more time, the better.

Easy DIY Floating Shelves Floating Shelf Tutorial Video & Free Plans
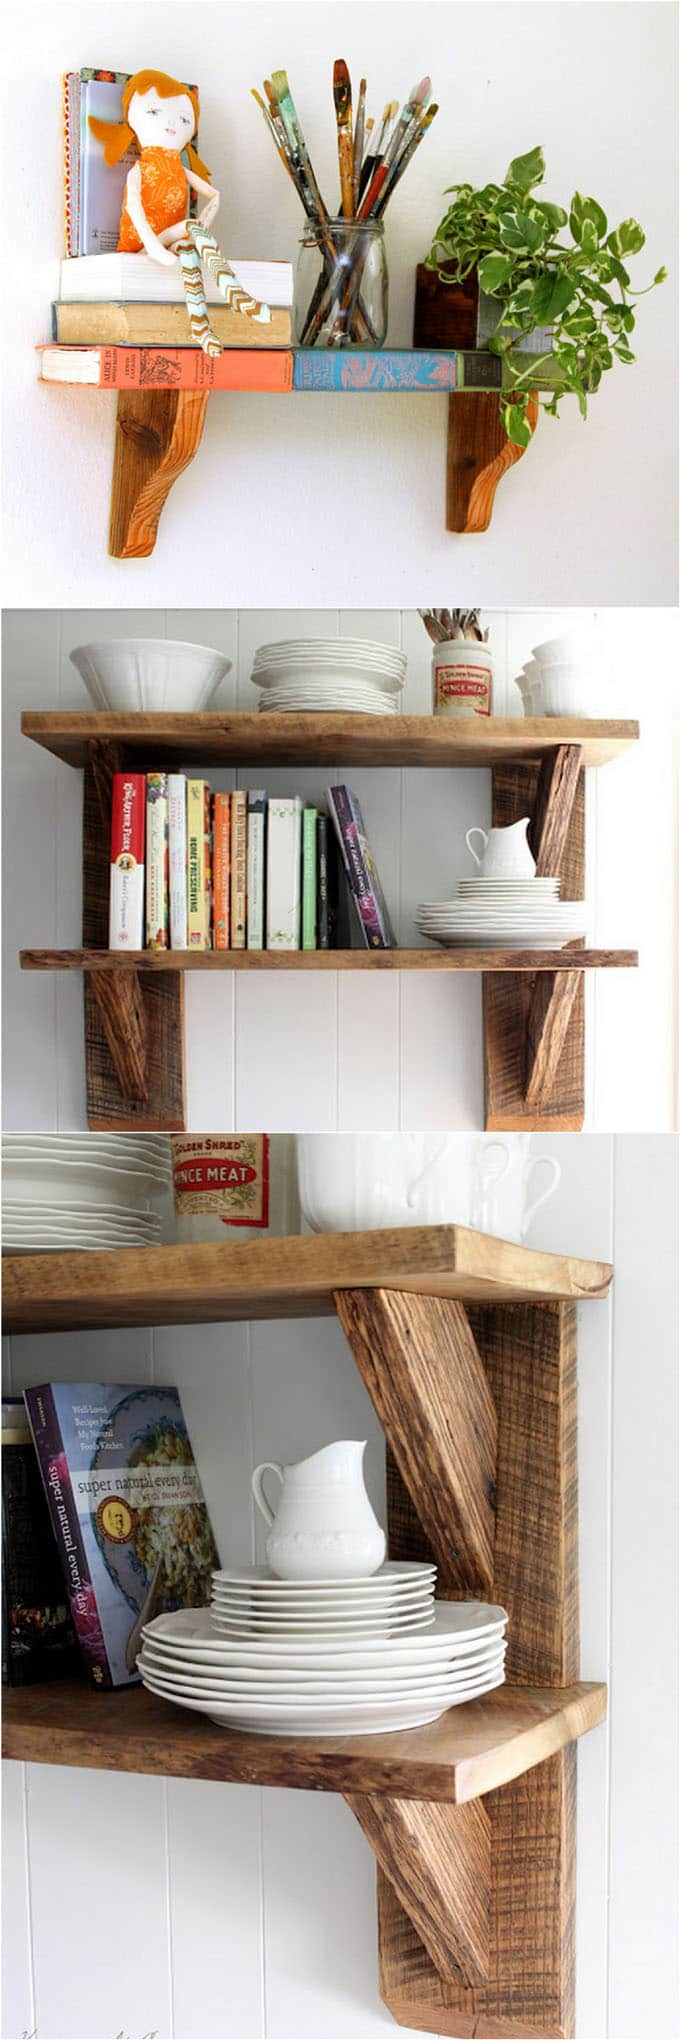
Hexagon and Triangle Shelves. My Love 2 Create. Put a twist on the traditional floating shelves with these hexagon and triangle shelves. They're a unique shape that really adds some interest to any space in your house. The best part is, they are extremely budget-friendly and you can build them for under $10 each.
